- Turbo
- Blog
Nettoyage du magasin de circuits imprimés Il faut éliminer les débris non fixés et la contamination de process sans modifier la géométrie des fentes, la précision de réglage, les surfaces des matériaux ni la fonction ESD déclarée du rack. La poussière, les résidus de pâte à braser, les étiquettes, le ruban adhésif, les fibres et les fragments de cartes peuvent obstruer les fentes de guidage ou transférer la contamination aux assemblages. Cependant, les solvants agressifs, le trempage, les outils abrasifs et l'air comprimé non contrôlé peuvent propager les débris, endommager les polymères, effacer l'identification ou altérer le comportement de surface. Une procédure sûre commence par les informations sur les matériaux du fabricant du rack et le plan d'usine de contrôle de la contamination. Ce guide fournit aux équipes SMT, d'assemblage de PCB et de maintenance une méthode pratique pour la mise en quarantaine, le nettoyage à sec, le nettoyage humide compatible, le séchage, l'inspection, les contrôles fonctionnels et la libération documentée.
Identifier le support et la contamination avant le nettoyage
Enregistrez l'actif ou le lot du support, le modèle, le matériau de construction, le type de réglage, la classe d'exposition à la température le cas échéant, le réglage actuel de la largeur et le motif du nettoyage. Distinguez la poussière ordinaire du flux, de la pâte, de l'huile, de l'adhésif, de la corrosion ou d'un résidu inconnu, car chacun peut nécessiter une intervention approuvée différente.
Si la contamination est inconnue, liée à un écart de procédé ou potentiellement dangereuse, mettez le portoir en quarantaine et consultez les équipes responsables de la sécurité et des procédés. N'effectuez pas d'essais avec des solvants sur les équipements de production et ne mélangez pas les résidus dans un bain de nettoyage général.

Protéger la géométrie du guide et les mécanismes de réglage
Déchargez tous les circuits imprimés et retirez le rack de la ligne active. Ne déverrouillez ou ne verrouillez le mécanisme de réglage que conformément à la procédure approuvée. Soutenez le châssis sur une surface propre afin que les panneaux latéraux ne soient pas tordus. Maintenez les petites pièces, les butées, les vis et les étiquettes sous contrôle.
Les fentes de guidage déterminent le support et l'espacement des cartes. Ne forcez jamais une lame, une lime ou un racloir dur à l'intérieur. Des rayures, des bavures, des fentes élargies ou des panneaux tordus peuvent endommager les cartes et provoquer des bourrages. Considérez la vis, la courroie, l'engrenage, le loquet et la serrure comme des interfaces de précision plutôt que comme de la quincaillerie ordinaire.
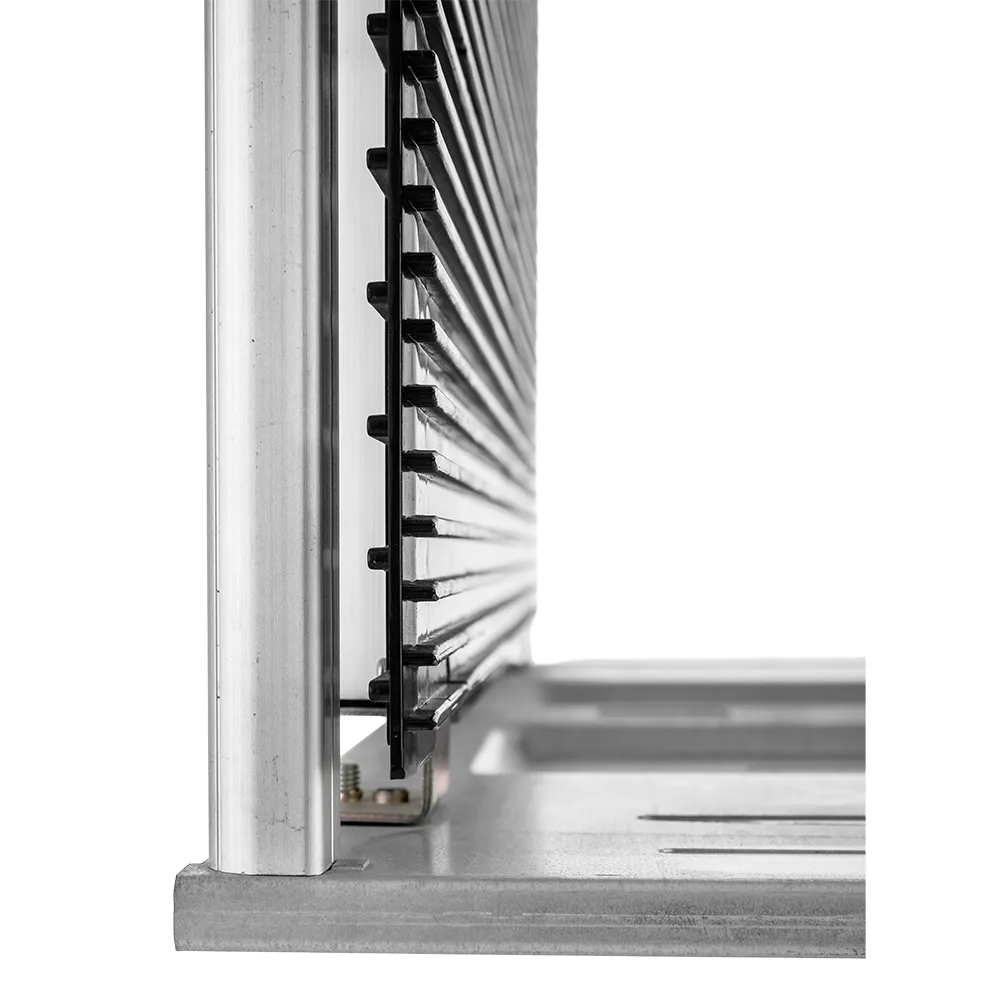
Utilisez la méthode de nettoyage approuvée la moins agressive
Commencez par l'élimination contrôlée des particules libres à l'aide d'un aspirateur propre approuvé, d'une lingette ou d'un outil souple. L'air comprimé peut redistribuez la contamination ou la propulser dans les mécanismes, ne l'utilisez donc que là où la procédure écrite et les contrôles de l'installation le permettent. Travaillez des zones les plus propres vers les zones les plus sales et changez les lingettes avant qu'elles ne redéposent des matières.
Pour le nettoyage humide, confirmez la compatibilité chimique avec les panneaux, les bases métalliques, les fixations, les étiquettes, les adhésifs et les mécanismes lubrifiés. Appliquez le minimum de liquide requis et évitez toute immersion non contrôlée. Ne prétendez pas que l'alcool, l'eau ou un autre nettoyant courant est universellement sûr pour la construction de chaque rack.
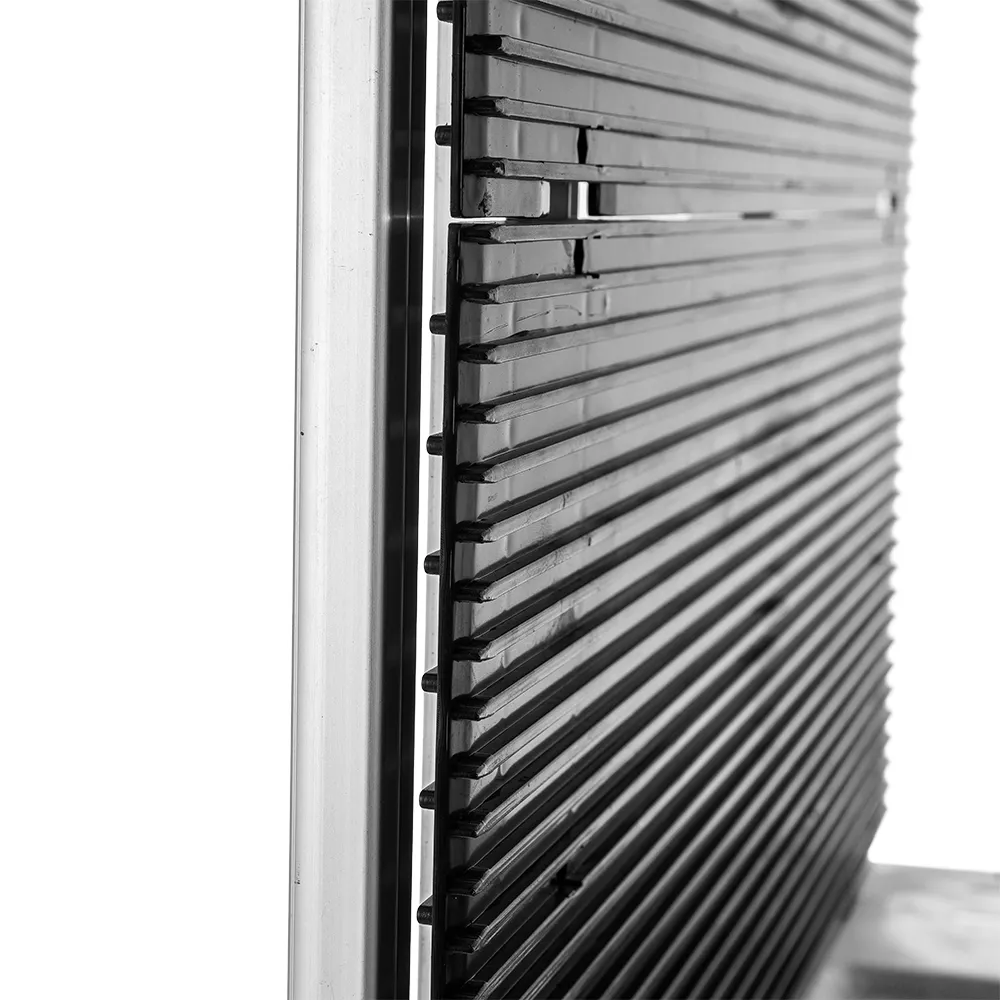
Sécher complètement et inspecter chaque surface fonctionnelle
Laissez sécher le support dans la zone et l'orientation approuvées. Le liquide piégé autour des fixations, des bases ou de la quincaillerie de réglage peut transporter des résidus ou favoriser la corrosion. N'accélérez pas le séchage avec une chaleur excessive à moins que la construction complète du support et les étiquettes ne soient qualifiées pour cela.
Sous un bon éclairage, inspectez les rainures de guidage, les chanfreins d'entrée, les butées, les panneaux latéraux, les bases, les poignées, les fixations, les étiquettes et les pièces de réglage. Recherchez les débris restants, les films, le gonflement, les fissures, la corrosion, la quincaillerie desserrée et les bords de rainure endommagés. Isolez tout ce qui ne peut pas être évalué avec certitude.
Réinitialiser, vérifier et libérer le rack
Réglez le support à une largeur contrôlée à l'aide de la référence ou du gabarit approuvé. Confirmez que les panneaux sont parallèles, que les verrouillages tiennent, que les butées sont bien fixées et que le réglage se déplace en douceur. Chargez des cartes représentatives sans composants ou des échantillons approuvés pour vérifier l'insertion, la retenue et le retrait sans frottement ni jeu excessif.
Lorsque le rack a un rôle ESD déclaré, effectuez la vérification spécifiée après le nettoyage en utilisant la méthode, les emplacements et les conditions approuvés. Enregistrez le produit de nettoyage, le lot ou la concentration le cas échéant, la date, l'opérateur, le résultat de l'inspection, les dimensions ou les contrôles fonctionnels, le résultat ESD et la décision de libération.
Tableau de contrôle pratique
| Étape | Point de contrôle | Divulguer des preuves |
|---|---|---|
| Quarantaine | Identité du rack et type de contamination | Actif et motif enregistrés |
| Élimination à sec | Pas de propagation ni d'abrasion incontrôlée | Emplacements visiblement exempts de débris non fixés |
| Nettoyage humide | Produit chimique approuvé et exposition minimale | Pas de film, de boursouflure ou de dommage sur l'étiquette |
| Séchage | Aucun liquide ni résidu piégé | Inspection visuelle complète |
| Ajustement | Largeur, parallélisme, verrouillage et butées | Procès des jauges et du conseil représentatif |
| Vérification ESD | Méthode et emplacements définis | Résultat de réussite enregistré le cas échéant |
Élaborer une procédure contrôlée et un exemple d'approbation
Procédure de chantier Responsable : [Insérer le responsable] Matériaux approuvés : Échantillon d'approbation ou ensemble photographique identifié. Séquence : 1. Former le personnel avec l'itinéraire réel et les équipements. 2. Observer plusieurs cycles normaux. Critères de réussite : Conforme à la configuration attendue. Conditions d'arrêt : Écart par rapport à la configuration approuvée ou anomalie sur l'équipement. Actions de l'opérateur : - Ce qui peut être corrigé immédiatement : Ajustements mineurs conformes à la configuration de référence. - Ce qui nécessite une mise en quarantaine et un réexamen : Tout défaut majeur ou non-conformité par rapport à l'échantillon d'approbation. Enregistrements : Consigner les formations, les observations de cycles et les rapports de contrôle.
Séparez la sécurité, la propreté, le fonctionnement mécanique et la vérification ESD. Un seul contrôle visuel ne peut pas couvrir tous les risques, et une seule lecture électrique ne peut pas prouver la propreté ou l'intégrité mécanique. Lorsqu'une mesure est requise, identifiez l'instrument, la méthode, les emplacements, l'environnement et les limites d'acceptation. Maintenez l'étalonnage des équipements et la formation du personnel à jour dans le cadre du système de l'installation.
Contrôle des réceptions et gestion des modifications
À la réception, comparez l'article, la quantité, la révision, le lot fournisseur et l'étiquette d'emballage au bon de commande. Inspectez pour détecter tout dommage, contamination, absence d'identification et différence inattendue de couleur, de texture, de géométrie, d'odeur, de quincaillerie ou d'emballage. Prélevez des échantillons pour vérifier les dimensions et les attributs fonctionnels selon le plan convenu. Mettez en quarantaine les changements inexpliqués plutôt que de laisser la pression de la production transformer une exception en une approbation non documentée.
Exiger une notification avant toute modification de la source des matériaux, des additifs, de l'adhésif, de l'outillage, des dimensions, du produit de nettoyage, de la construction ou de la quincaillerie critique. La requalification doit se concentrer sur les fonctions affectées par la modification, mais doit tout de même vérifier les interactions. Un adhésif plus puissant peut affecter le retrait ; une nouvelle roulette peut affecter le suivi et les chemins électriques ; un nouveau produit de nettoyage peut affecter les étiquettes et le comportement de la surface.
Essai de qualification et records
Exécutez l'essai dans des conditions environnementales et opérationnelles représentatives. Enregistrez la date, le lieu, les opérateurs, les échantillons, les numéros de lot, l'équipement, la préparation du nettoyage, l'itinéraire, les observations et les écarts. Incluez un article approuvé actuel comme référence dans la mesure du possible. Ne cachez pas une défaillance critique dans un score moyen. La sécurité, la protection du produit, la contamination, l'ergonomie, la documentation et les exigences ESD doivent faire l'objet de décisions de réussite distinctes.
Examiner les résultats après un nombre de cycles suffisant pour révéler la variation normale. Une seule démonstration réussie peut passer à côté des différences liées aux opérateurs, des pics de trafic, de l'usure, des effets de charge et de nettoyage. Le rapport doit mentionner les limites : ce qui n'a pas été testé, quelles allégations restent des déclarations du fournisseur et quelles conclusions s'appliquent uniquement à la configuration testée. Conserver les preuves avec l'élément ou le dossier de processus afin que les futures équipes puissent comprendre le fondement de l'approbation.
Auditer le processus après la mise en production
Observez le processus pendant le travail normal après la libération, et pas seulement lors d'une démonstration planifiée. Confirmez que les utilisateurs suivent la séquence approuvée, que les matériaux restent disponibles, que les étiquettes sont lisibles et que les conditions d'arrêt sont comprises. Échantillonnez les enregistrements pour détecter les résultats manquants, les échecs répétés et les substitutions inexpliquées. Demandez aux opérateurs où la procédure est difficile, car les solutions de contournement révèlent souvent un problème d'adéquation, d'accès, de circulation ou de formation avant qu'il ne devienne un défaut du produit.
Analysez les tendances des défaillances par article, emplacement, équipe et lot de fournisseur lorsque les enregistrements disponibles le permettent. Les problèmes répétés doivent déclencher une analyse des causes, et non pas simplement un remplacement plus fréquent. Mettez à jour la procédure lorsque le produit, l'atelier, l'équipement, le produit de nettoyage, le circuit de circulation, l'emballage ou le plan de surveillance change. Conservez la date de révision visible et retirez les copies obsolètes afin que la méthode approuvée reste sans ambiguïté.
Liste de contrôle RFQ pour les acheteurs
Précisez l'application, l'environnement, les dimensions, les interfaces, la construction, la fonction requise, la méthode d'essai, les critères d'acceptation, la propreté, l'emballage, l'étiquetage, la traçabilité, la quantité d'échantillons, la documentation et la notification des modifications. Passez en revue le Rack à magazines pour circuits imprimés SWESD et le Centre de produits SWESD à titre de points de départ ; l'approbation finale doit correspondre à l'article fourni et au propre programme de contrôle de l'acheteur.
- Décrire l'itinéraire d'utilisation réelle et le produit protégé.
- Identifier les critères éliminatoires et les preuves acceptables.
- Demandez des plans, des matériaux et des résultats de tests traçables le cas échéant.
- Définissez les quantités d'échantillons et de premier article avant la production.
- Lister les hypothèses approuvées de nettoyage, d'inspection et de remplacement.
- Exiger la divulgation écrite des exceptions et des modifications.
Ressources SWESD associées
- pièces de rechange pour présentoir de magazines
- comprendre un rack à magazines ESD
- planification des points de tampon SMT avec des chargeurs de magazines
Vidéo éducative : Processus d'impression de pâte à braser IPC SMT et défauts courants
Cette vidéo éducative neutre de Lean Six Sigma Training fournit des informations de base sur le processus contrôlé. Le guide écrit reste complet sans elle.
Foire aux questions
Tous les racks de magazines pour PCB peuvent-ils être nettoyés avec de l'alcool ?
Non. Confirmez la compatibilité avec l'ensemble de la construction, des étiquettes, des adhésifs et des mécanismes avant d'approuver un nettoyant.
Faut-il utiliser de l'air comprimé dans les fentes de guidage ?
Uniquement lorsque la procédure écrite de l'installation le permet et contrôle la redistribution des particules. L'aspiration ou l'essuyage contrôlé peuvent être plus appropriés.
Que faut-il vérifier après le nettoyage ?
Vérifier la siccité, les résidus, l'état des fentes, l'alignement des panneaux, la largeur, les verrous, les butées, le déplacement des cartes, les étiquettes et toute vérification ESD requise.
Quand un rack doit-il être mis en quarantaine ?
Mettez-le en quarantaine en raison d'une contamination inconnue, de fentes endommagées, d'un gonflement, d'une corrosion, d'un échec de réglage, de pièces desserrées ou d'un échec de vérification.
Laisser un commentaire